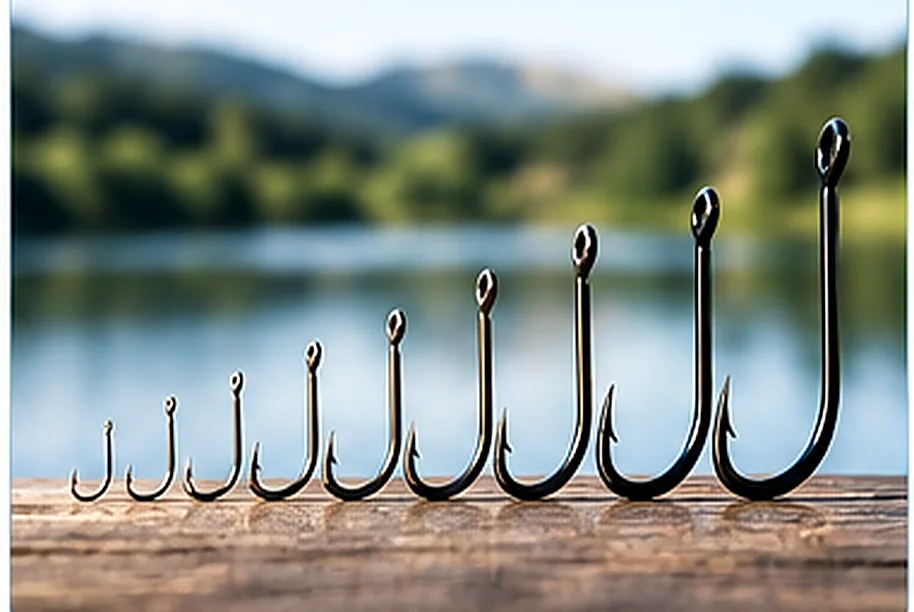
Terminal tackle rarely fails at the hook itself. It fails where the line meets the hook, and that joint is governed by two variables that have nothing to do with knot names: the form of the attachment point and the material of the line. Hook ranges made for Bait Hooks are grouped by attachment form rather than by size number, because the connection has to follow the hook.
Attaching a fishing hook line means matching the connection to the attachment point and to the line material, forming it in order, and verifying it before the first cast. That order does not change: inspect the attachment point, prepare the working end, form the connection, seat it, then confirm it under load. Inspection and the load check are the steps most often skipped, and the two that separate a connection that holds from one that lets go on Freshwater Hooks and saltwater patterns alike.
The sections below follow that order, beginning with the part of the hook that decides everything after it.
Check the Hook Attachment Point Before Connecting the Line
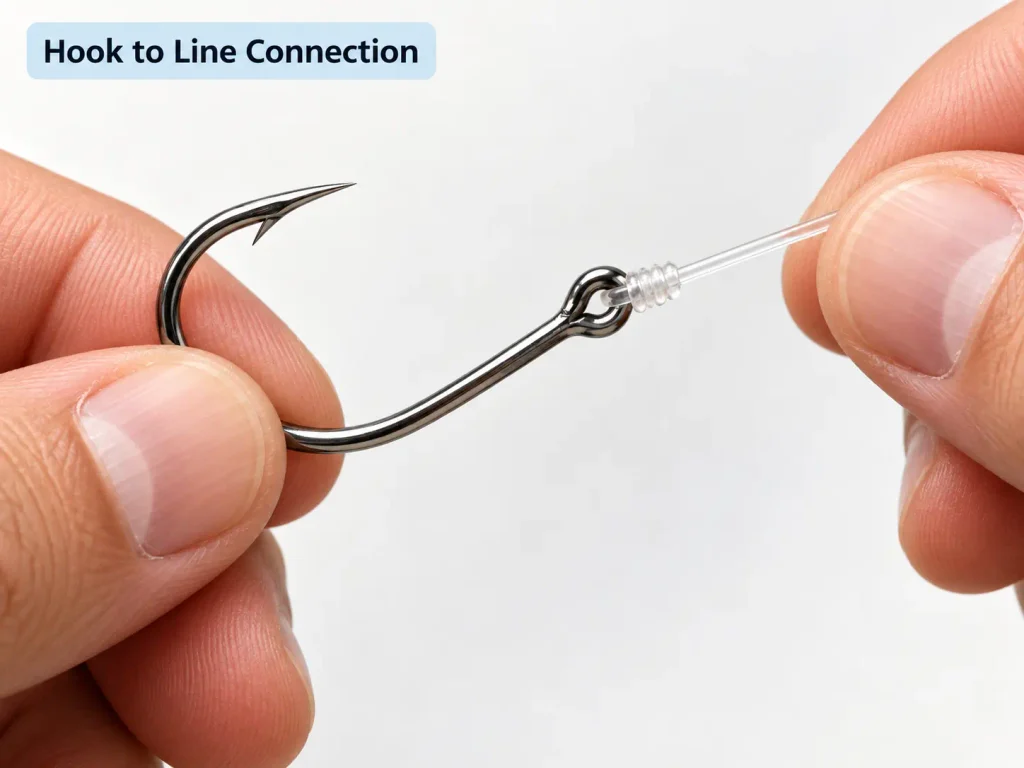
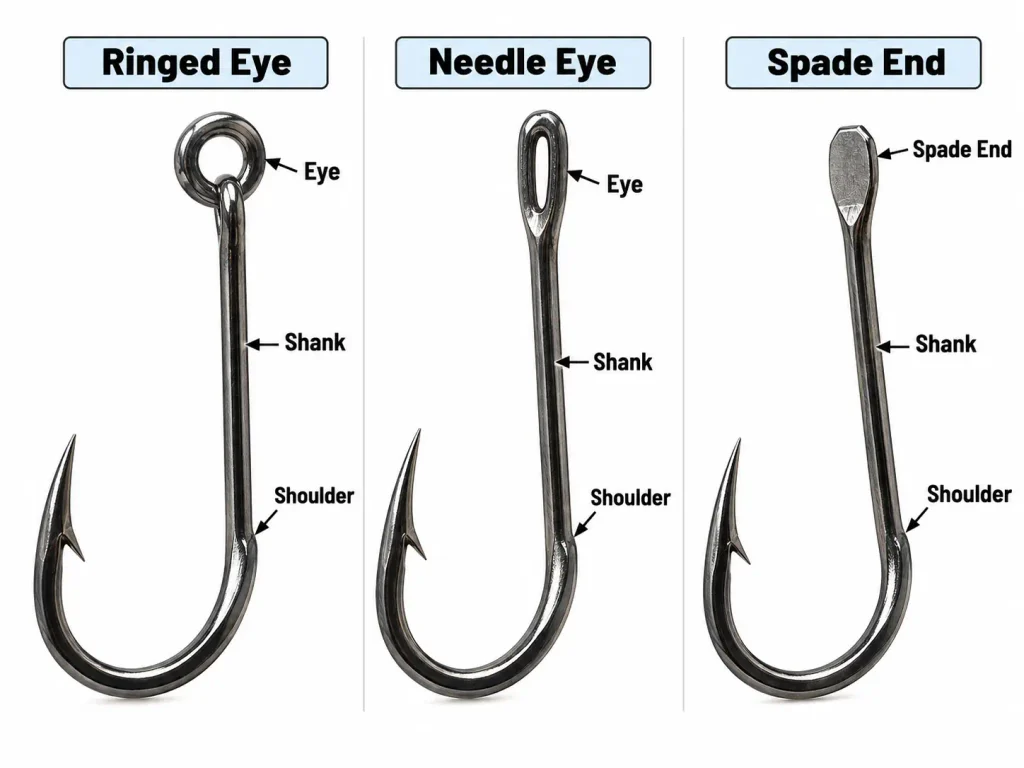
The attachment point, not the knot name, decides which connections are physically possible. A ringed eye accepts wrapped or doubled-line connections, a needle eye accepts only a connection sized to a narrow opening, a spade end accepts nothing but wraps formed along the shank, and a closed hanger is normally joined through hardware.
The parts of a fish hook that matter here are few, but beginners routinely skip them: the eye, the shank and the shoulder where the two meet.
Ringed Eyes and Eye Opening Conditions
A ringed eye is a closed loop of wire, and two conditions matter before any line passes. It should be closed with no gap, because a gap lets a coil escape under load, and its interior should be smooth, since burrs left by forming or plating cut a loaded line. Fraying just above the connection points at the eye rather than at the wraps.
Needle Eyes, Spade Ends and Hooks Without a Ring
Not every attachment point is a ring. A needle eye is formed by tapering the wire and bending the point back on itself, which leaves a narrow opening rather than a round one: the line passes, but clearance is small, and forcing it damages the line before the connection is loaded. A spade end has no opening at all, because the wire is flattened into a tab, so the line is carried by wraps along the shank. Hooks on an eyeless shank therefore arrive either as blanks needing those wraps or already attached to a length of line. Inspect both for a smooth finish and no sharp shoulder.
Eye Alignment and Hook Shank Geometry
Eye alignment and shank geometry describe shape rather than attachment type, but both change how the line leaves the hook. A straight eye continues the shank axis, a turned-up eye lifts the line above it, and a turned-down eye drops it below. An offset or wide-gap bend pushes the point out of the shank plane so it can clear a bulky soft bait.
| Attachment point | What to inspect | Connection family | Common failure |
| Ringed eye | No gap, smooth interior, opening clears the line | Wrap or doubled line through the eye | Fraying above the connection |
| Needle eye | Narrow opening clear, no forming burr | Single-strand connection sized to the eye | Connection that never seats |
| Spade end or flattened tab | Smooth taper, no sharp shoulder | Wraps along the shank | Wraps sliding down the shank |
| Ringed eye too small | Opening against the line you will use | Lighter tippet or a pre-tied hook length | Line pinched or frayed at the eye |
How to Attach a Fishing Hook to the Line and Confirm It Is Right
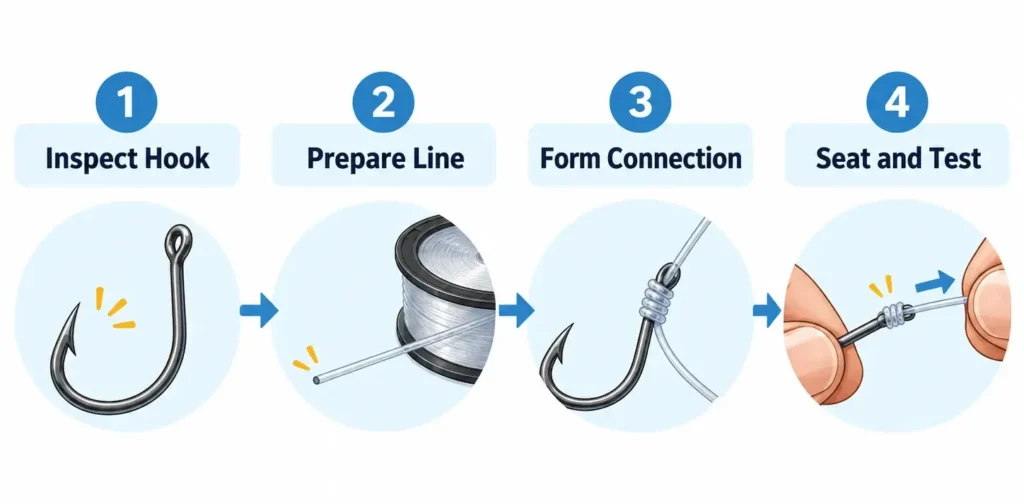
Attachment runs in four stages, and only one of them is about the connection itself. Inspect the attachment point, prepare the working end, form the connection, then seat it and confirm it under load. The wrap pattern belongs to whichever connection you chose; what carries across all of them is the pass condition at the end of each stage.
The Four Stages of an Attachment
Inspection covers eye closure, surface finish and opening clearance, before any line moves. Preparation covers the working end, since the last metre carries every defect from the previous trip and a sound connection on damaged line still fails. Formation is where the coils are laid, and its order depends on the family: a connection through an eye begins by passing the line through it, a shank connection begins by holding a loop against the shank, and a mechanical termination skips wraps altogether. That is why no single numbered sequence of wrap-and-pull steps describes all of them.
Three Checkpoints and Their Pass Conditions
| Checkpoint | When it happens | Pass condition | Fail signal and action |
| Attachment point | Before any line is passed | Eye closed, interior smooth, opening clears the line | Gap, burr or forced fit: change the hook or the line |
| The coils, before the draw | After the wraps are laid | Coils parallel and side by side, none crossing | Coils crossed or climbing: ease open, re-form |
| Seating under load | While the connection is drawn down | Seated at the eye or along the shank, coils even | Coils separate or creep: cut off and re-form |
The wrap pattern itself belongs to the individual connection, and a walkthrough of each one sits in the site guide to Tying Hook to Fishing Line. What the table supplies is the standard those connections have to meet, and the point at which abandoning a bad one is cheaper than finishing it.
How Different Fishing Lines Affect the Hook Connection
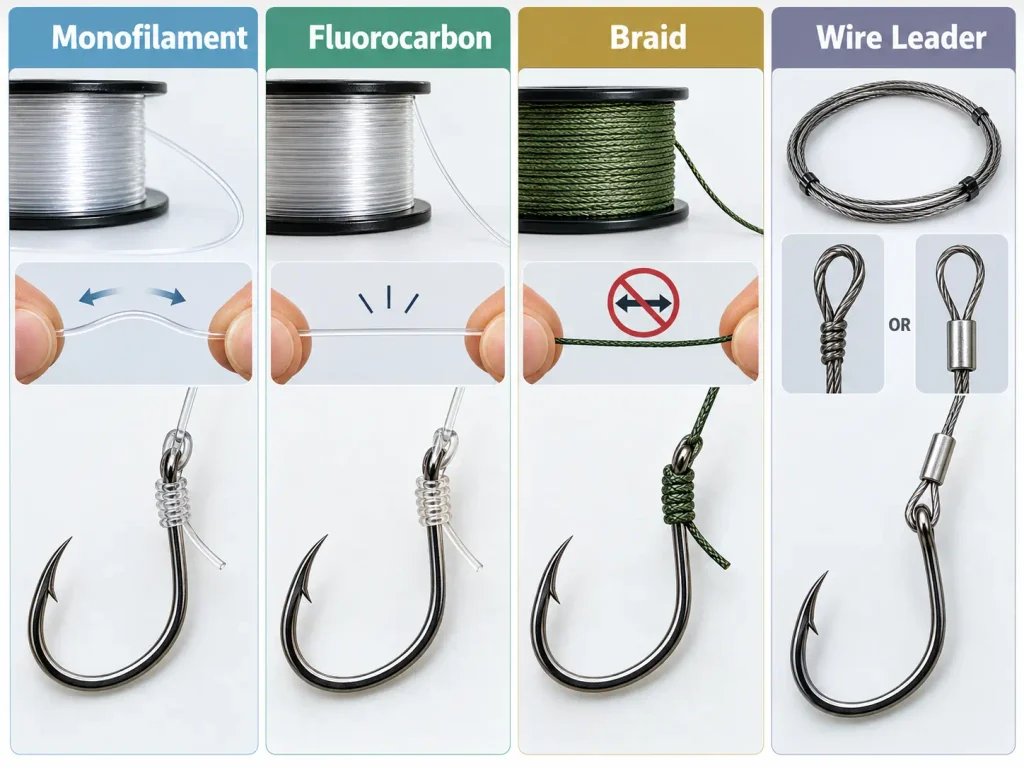
The same connection behaves differently in different materials, which is a question of how the line acts at the hook rather than which line to buy. Monofilament stretches and recovers, fluorocarbon is stiffer and more sensitive to friction, braid has almost no stretch and tends to creep, and wire is closed with twists or sleeves instead of friction.
The material changes which risks to watch for at the hook. The fishing line you choose sets the behaviour of the connection before a single wrap is formed.
Monofilament: Stretch and Controlled Tightening
Monofilament tolerates imperfect technique better than most materials, but it stretches under load and recovers afterwards, so a connection seated correctly can still relax slightly after repeated load cycles. Recheck it after a few casts. Spool memory also makes even wrapping harder near the working end.
Fluorocarbon: Stiffness and Friction Damage
Fluorocarbon is denser and stiffer, so coils take a set less readily and need more deliberate seating. It is also far less forgiving of a dry draw: friction heat damages the material internally, and the damage is invisible from outside, which is why lubricating before the final pull is not optional.
Braided Line: Slippage and Grip
Braid has very little stretch and a low-friction surface, a poor combination for connections that rely on friction alone. It grips well against itself but slides against smooth wire, so a doubled line is generally more dependable at the hook. Slippage often appears as a connection that holds for several casts and then eases away from the eye.
Wire Leaders: Twists, Sleeves and Mechanical Terminations
Wire is not closed with a friction knot the way nylon or braid is, and the two wire families are finished differently. Single-strand wire is typically closed with a twist formed along its own length, and it also accepts a sleeve crimped into place. Multi-strand wire leader is joined with sleeves or with terminations made for that wire. Either way, reliability depends on the sleeve matching the wire diameter and on the crimp being formed with the maker’s tool. Where a fishing swivel ends a wire leader, inspect the termination after every fish.
When Should You Attach the Line Along the Hook Shank?
Use a shank connection when the hook has no ring to pass a line through, when the eye opening is too narrow for the line you need, or when the presentation calls for the line to run along the shank. An eye connection remains the default for everything else.
Eye Connections Versus Shank Connections
An eye connection holds the hook at a single point, but how much it can move depends on the connection rather than on the eye alone. A loop left open lets the hook swing freely above the bait, while a connection drawn down snug against the eye limits movement to the geometry of the eye itself. A shank connection runs the line along the shank, removing that rotation and holding the hook in line with the pull. Octopus Hooks are a familiar example of the short-shank, turned-up eye pattern.
How Line Alignment Changes the Pull Direction
The angle at which the line leaves the hook determines how force reaches the point. On an eye connection, force arrives at the eye and the hook can pivot around it, so the point travels in an arc. On a shank connection, force travels along a line that passes close to the point, which keeps the point driving with the pull rather than swinging into it.
How to Diagnose a Hook Connection That Failed
Diagnosis starts at the point of failure rather than at the wraps. Where the line gave way, and what it looks like either side of that point, tells you whether the cause was movement, a cut, abrasion or heat, and each has a different correction.
Read the Point of Failure First
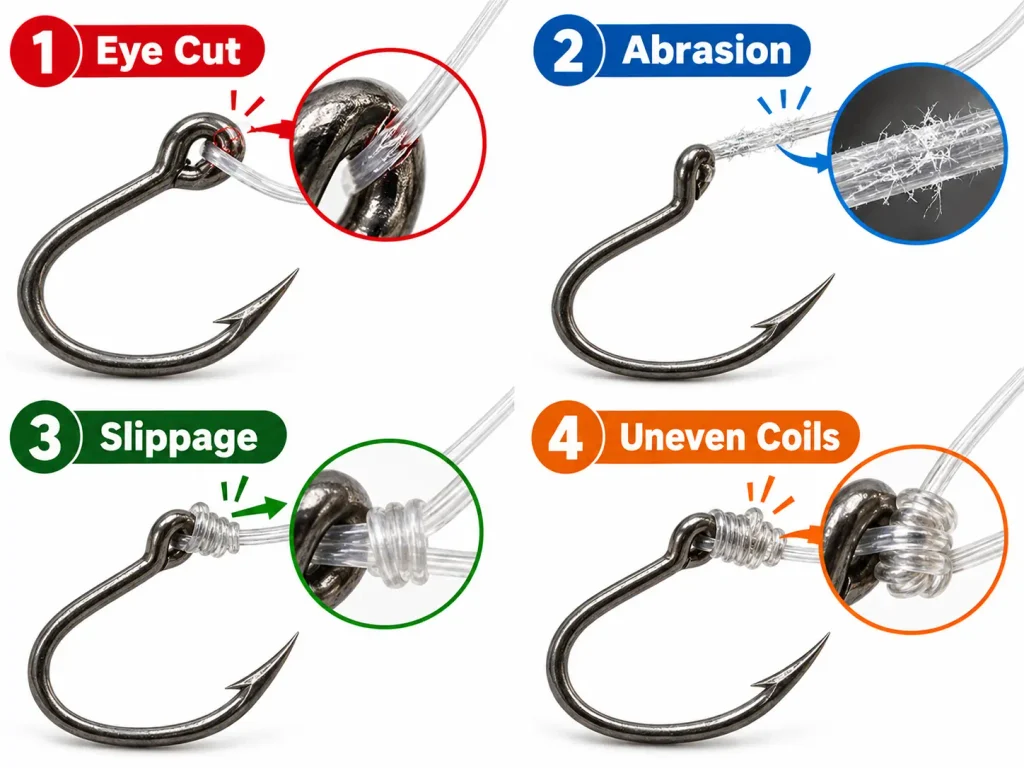
Four locations account for almost every failure. At the tag end or the coils, the connection moved. At the eye, the line was cut or crushed. Just above the connection, the line was abraded over a stretch. At a twist or a sleeve on a wire leader, the termination gave way.
Telling Creep, Cut and Abrasion Apart
A connection that crept looks almost normal: the line is unmarked and the only evidence is a tag end shorter than it was or a connection that no longer sits at the eye. A cut at the eye leaves the wraps intact and a clean, square end on the line. Abrasion shows as line that is dulled or fuzzy over a span of a few centimetres, the signature of an eye with a burr or a gap. Heat from a dry draw leaves the material near the coils discoloured or flattened, without a clean break. Coils that sit unevenly after the draw are a special case: the connection is intact but no longer shares load evenly, so it fails earlier than the same connection formed with parallel wraps.
Matching the Symptom to the Correction
| Symptom | Where to look | What it rules out | Correction |
| Tag end shorter than when tied | The line surface, then the coils | An eye defect, since the line is unmarked | More wraps, or a doubled line |
| Clean break with the wraps intact | The eye interior and closure | A failure of the wraps | Replace the hook; lubricate before the draw |
| Roughened line above the connection | The eye, the coating, nearby cover | Slippage as the cause | Cut back above the damage; inspect the hook |
| Coils uneven or bunched after the draw | The wraps as they were formed | Material weakness | Cut off and re-form with parallel wraps |
How to Test the Connection Before Casting
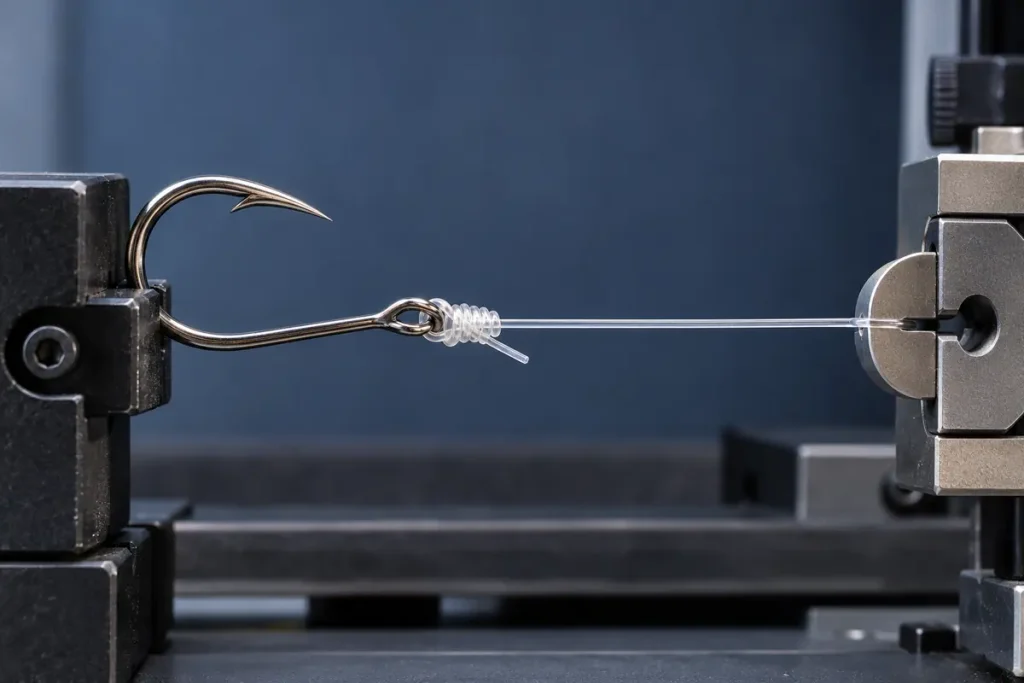
A controlled pull test is the only reliable way to confirm a connection before it has to hold anything. Load it to roughly the pressure you expect on the water, and no more, because a test pulled far beyond normal fishing load can damage the line and produce a failure that would never have happened otherwise.
Performing a Controlled Pull Test
Fix the hook so it cannot move, either by the bend or in a hook holder, and keep fingers clear of the point while the line is under load. Hold the standing line and draw it up steadily until it reaches the load you expect in use, then hold for a few seconds. Apply force progressively rather than in a jerk, and watch the coils while the connection is loaded.
Signs That the Connection Must Be Retied
Cut it off if the coils separate under load, if the connection has moved away from the eye or down the shank, if the line has changed appearance at the connection, or if the pull felt inconsistent, with a soft initial give followed by stiffness.
Final Hook and Line Inspection
After the test, check the point for sharpness, because a connection is only half of the terminal system. Then confirm that the connection sits where you intended, that the tag end is trimmed to a short working length rather than cut flush, and that the line leaves the hook in the direction your presentation needs.
Frequently Asked Questions
The questions below cover the details that come up once the basic procedure is settled, from tag end length to when a connection should be replaced.
How long should the tag end be after attaching a hook?
Leave enough to grip while the connection is drawn down, then trim to a short working length rather than flush with the coils. A tag end cut flush can be nicked by the cutters, and that nick sits where the connection is loaded.
Can you attach a hook without tying a knot?
Yes, in two practical ways. A hook that arrives already attached to a length of line needs no tying, and a hook with a closed hanger on a hard lure is joined with a split ring or a clip. Wraps formed along the shank are not an exception: they are a knot in their own right.
Does the weight or the hook go first on the line?
Neither goes first in a fixed sense, because the two sit at different points in the rig. In a simple bottom rig the hook sits at the end of the line and the weight above it. In a drop shot rig the order reverses, with the hook above the weight.
Why does braided line slip at the hook?
Braid has a low-friction surface and very little stretch, so a connection relying on friction between the line and smooth wire has little to hold onto. The cause is usually the material rather than the technique.
When should a hook connection be replaced?
Inspect it after every fish, after any snag, and after fishing over rough structure, then replace it on evidence rather than on a count: a shortened tag end, roughened line near the eye, coils that will not sit evenly, or an eye that is marked, opened or burred.
Consistency at the attachment point is a manufacturing question as much as an angling one: eye closure, surface finish and eye diameter have to hold to specification, and buyers evaluating a hook range can raise those requirements with the Contact Fishing Hook Manufacturing Team.